


- What is DeepSeek Janus-Series?
- Step-by-Step Installation Guide for DeepSeek Janus-Pro
- Example: Enhancing Image Descriptions with DeepSeek Janus-Pro
- Optimizing Performance in DeepSeek Janus-Pro 7B
- Adjusting Parameters for Better Response Generation
- Troubleshooting Common Issues
- Comparison with Other Local AI Models
- Conclusion
DeepSeek Janus-Pro is an open-source multimodal AI model developed by DeepSeek, designed to integrate visual and language processing capabilities within a unified architecture.
It employs the SigLIP-L Vision Encoder, enabling functionalities such as image generation from text prompts and comprehensive image understanding.
Running it locally ensures privacy, control, and faster response times without relying on cloud-based solutions.
In this guide, we’ll walk you through the step-by-step process of setting up and using DeepSeek Janus-Pro on your machine, covering installation, configuration, and best practices to maximize its potential.
What is DeepSeek Janus-Series?
The DeepSeek Janus-Series is a collection of advanced multimodal AI models designed to process and generate both textual and visual data seamlessly.
Each model in the series builds upon the previous one, introducing enhancements in efficiency, accuracy, and image generation quality. Here’s a breakdown of the three models:
1. Janus
Janus serves as the foundation of the series, featuring a unified transformer architecture that allows it to handle both language and vision-based tasks effectively. It employs an autoregressive framework, meaning it predicts sequences step by step, making it well-suited for tasks like image captioning, text-based image retrieval, and multimodal reasoning.
2. JanusFlow

JanusFlow expands on Janus by introducing flow-based rectification techniques, which enhance its image generation capabilities. This results in smoother, more coherent visual outputs compared to its predecessor. The model is optimized for stability and high-quality rendering, making it a strong competitor to existing text-to-image models.
3. Janus-Pro

The most advanced model in the series, Janus-Pro, is designed for high-performance multimodal AI applications. It features:
- Expanded training datasets, improving both text and image understanding.
- Optimized inference efficiency, allowing for faster response times.
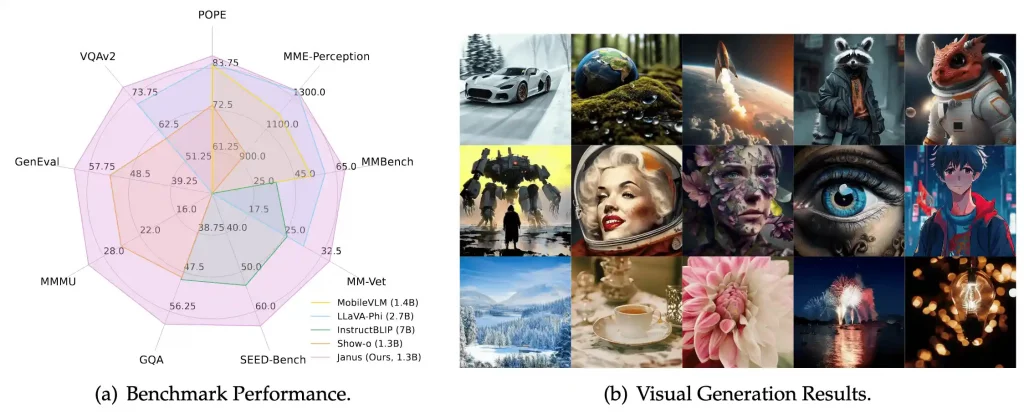
- Superior image generation, often outperforming models like DALL-E 3 and Stable Diffusion in benchmark tests.
Step-by-Step Installation Guide for DeepSeek Janus-Pro
1. System Requirements
Before installing, ensure your system meets the following requirements:
Hardware Requirements:
- GPU: NVIDIA GPU with at least 16GB VRAM (e.g., RTX 3090, RTX 4090) for smooth performance.
- RAM: Minimum 16GB (32GB recommended for optimal performance).
- Storage: At least 20GB of free space for model weights and dependencies.
- CPU: A modern multi-core processor (Intel i7/AMD Ryzen 7 or higher recommended).
Software Requirements:
- Operating System: Windows 10/11 (64-bit).
- Python: Version 3.8 or later (recommended 3.10+).
- CUDA Toolkit: For GPU acceleration (ensure it’s compatible with your GPU drivers).
- Microsoft Visual C++ Build Tools: Needed for compiling certain Python packages.
2. Install Essential Software and Dependencies
Step 1: Install Python
- Download Python 3.10+ from the official website.
- During installation, check the box “Add Python to PATH” before clicking install.
Verify the installation using:
python --version
Step 2: Install CUDA Toolkit (for NVIDIA GPUs)
- Download the CUDA Toolkit from NVIDIA’s website.
- Install it and ensure it matches your GPU driver version.
Step 3: Install Microsoft Visual C++ Build Tools
- Download from Microsoft’s official site.
- Select “Desktop development with C++“ and install it.
3. Set Up Virtual Environment
To avoid conflicts with other Python projects, create a virtual environment.
– Open Command Prompt and navigate to your desired project directory:
cd path\to\your\project
– Create a virtual environment:
python -m venv janus_env
– Activate the virtual environment:
janus_env\Scripts\activate
(You’ll see (janus_env) appear before the command line, indicating it’s activated.)
4. Install Required Python Packages
– Upgrade pip first:
pip install --upgrade pip
Now, install the required dependencies.
– Install PyTorch with CUDA support (for GPU acceleration):
pip install torch torchvision torchaudio --index-url https://download.pytorch.org/whl/cu118
(Replace cu118 with your CUDA version, e.g., cu121 for CUDA 12.1.)
– Install the Hugging Face Transformers library:
pip install transformers
– (Optional) Install SentencePiece and other tools for tokenization:
pip install sentencepiece accelerate
5. Download and Load DeepSeek Janus-Pro 7B Model
We will use Hugging Face Transformers to download and load the model.
– Create a Python script (e.g., download_model.py) and add the following code:
from transformers import AutoModelForCausalLM, AutoTokenizer

model_name = "deepseek-ai/Janus-Pro-7B"

# Load tokenizer and model
tokenizer = AutoTokenizer.from_pretrained(model_name)
model = AutoModelForCausalLM.from_pretrained(model_name)

print("Model and tokenizer downloaded successfully!")
– Run the script to download the model:
python download_model.py
This will automatically download the Janus-Pro 7B model to your local machine.
6. Running DeepSeek Janus-Pro 7B Locally
Now, let’s test the model by generating a response to a prompt.
– Create another Python script (e.g., run_janus.py) and add:
from transformers import AutoModelForCausalLM, AutoTokenizer

model_name = "deepseek-ai/Janus-Pro-7B"

# Load tokenizer and model
tokenizer = AutoTokenizer.from_pretrained(model_name)
model = AutoModelForCausalLM.from_pretrained(model_name)

# Input prompt
input_text = "Describe a futuristic city with AI-driven infrastructure."
inputs = tokenizer(input_text, return_tensors="pt")

# Generate response
outputs = model.generate(**inputs, max_length=100)
response = tokenizer.decode(outputs[0], skip_special_tokens=True)

print("AI Response:", response)
Run the script:
python run_janus.py
The model will process the input and generate an AI-generated response based on DeepSeek Janus-Pro’s capabilities.
Example: Enhancing Image Descriptions with DeepSeek Janus-Pro
Now, let’s refine the caption using DeepSeek Janus-Pro 7B for a more detailed and engaging description.
Step 1: Install and Load Janus-Pro
pip install transformers
Step 2: Generate an Enhanced Description
from transformers import AutoModelForCausalLM, AutoTokenizer

# Load DeepSeek Janus-Pro 7B
model_name = "deepseek-ai/Janus-Pro-7B"
tokenizer = AutoTokenizer.from_pretrained(model_name)
model = AutoModelForCausalLM.from_pretrained(model_name)

# Generate an enhanced description
input_text = f"Improve this image description: '{caption}'. Make it more engaging and detailed."
inputs = tokenizer(input_text, return_tensors="pt")

outputs = model.generate(**inputs, max_length=150)
enhanced_caption = tokenizer.decode(outputs[0], skip_special_tokens=True)

print("Enhanced Caption:", enhanced_caption)
Example Output
Input Image

BLIP-Generated Caption
“A beautiful sunset over the ocean with waves crashing on the shore.”
DeepSeek Janus-Pro Enhanced Caption
The sun sets in a mesmerizing blend of orange, pink, and purple hues, reflecting off the calm ocean waves as they gently kiss the golden shore. A silhouette of a distant sailboat adds a touch of adventure to the serene scene.”
Optimizing Performance in DeepSeek Janus-Pro 7B
DeepSeek Janus-Pro 7B is a powerful model, but optimizing it for faster inference, lower memory usage, and better response quality can significantly improve its usability. Below are key strategies to achieve this.
1. Speeding Up Inference with GPU Acceleration
Using a GPU (NVIDIA CUDA-enabled) can drastically improve inference speed compared to CPU execution.
– Enable GPU Support (Using PyTorch & CUDA)
First, ensure PyTorch detects your GPU:
import torch
print("GPU Available:", torch.cuda.is_available())
print("GPU Name:", torch.cuda.get_device_name(0) if torch.cuda.is_available() else "None")
If running on CPU, switch to GPU:
device = "cuda" if torch.cuda.is_available() else "cpu"
model.to(device)
– Use Flash Attention for Faster Inference
Flash Attention optimizes memory usage for large models. Install it via:
pip install flash-attn
Then, enable it when loading the model:
from transformers import AutoModelForCausalLM, AutoTokenizer

model_name = "deepseek-ai/Janus-Pro-7B"
tokenizer = AutoTokenizer.from_pretrained(model_name)
model = AutoModelForCausalLM.from_pretrained(model_name, torch_dtype=torch.float16, attn_implementation="flash_attention_2").to("cuda")
2. Reducing Memory Consumption (Using Quantization)
Quantization reduces the model’s memory footprint by converting weights from FP32 to INT8/4-bit precision, making it easier to run on consumer GPUs.
– Install BitsandBytes for 4-bit & 8-bit Quantization
pip install bitsandbytes
– Load Janus-Pro with 4-bit Quantization
from transformers import AutoModelForCausalLM, AutoTokenizer, BitsAndBytesConfig

quant_config = BitsAndBytesConfig(load_in_4bit=True)
model = AutoModelForCausalLM.from_pretrained(model_name, quantization_config=quant_config).to("cuda")
Benefits of Quantization:
- Reduces VRAM usage from 30GB+ to 8GB-12GB (runs on RTX 3090/4090).
- Enables inference on mid-range GPUs like RTX 3060 (12GB).
Adjusting Parameters for Better Response Generation
Tuning parameters can improve response quality, balancing between creativity, coherence, and accuracy.
1. Adjust Temperature & Top-k Sampling
- Temperature (0.2–1.0): Lower values = more factual responses; higher = creative.
- Top-k Sampling (Top 40-100): Limits vocabulary choices to reduce randomness.
input_text = "Explain quantum computing in simple terms."
inputs = tokenizer(input_text, return_tensors="pt").to("cuda")

output = model.generate(**inputs, max_length=300, temperature=0.7, top_k=50, top_p=0.9)
print(tokenizer.decode(output[0], skip_special_tokens=True))
For factual answers, use lower temperature (0.2-0.5), top_k=40
For creative writing,g use higher temperature (0.7-1.0), top_k=100
Troubleshooting Common Issues
Even with proper installation, users may encounter errors related to hardware, compatibility, or performance. Here’s how to fix them.
1. Installation Errors & Fixes
- Error:
pip install deepseekfails - Fix: Use
pip install transformers torchinstead
- Error:
torch.cuda.is_available() = False - Fix: Install CUDA-compatible PyTorch version:
pip install torch torchvision torchaudio --index-url https://download.pytorch.org/whl/cu118
2. Model Not Loading or Running Slow
- Issue: Model takes too long to load on CPU
- Fix: Use a GPU or load the model in 8-bit/4-bit mode:
quant_config = BitsAndBytesConfig(load_in_4bit=True)
model = AutoModelForCausalLM.from_pretrained(model_name, quantization_config=quant_config).to("cuda")
- Issue: Out-of-memory (OOM) on low-VRAM GPUs
- Fix: Reduce sequence length & use 4-bit quantization
3. Compatibility Issues with OS or Hardware
Error: torch: cannot allocate memory
Fix: Increase swap memory (Linux/macOS):
sudo fallocate -l 16G /swapfile
sudo chmod 600 /swapfile
sudo mkswap /swapfile
sudo swapon /swapfile
- Error: Model fails on Windows WSL
- Fix: Run inside native Linux or use WSL 2 with CUDA
Comparison with Other Local AI Models
| Feature | DeepSeek Janus-Pro | Llama 3 | Mistral Large |
| Multimodal Support | Yes | No | No |
| Image Generation | Yes | No | No |
| Open-Source License | Yes (MIT) | Yes | Yes |
| Architecture | t nified | Transformer-based | Transformer-based |
| Benchmark Performance | Outperforms DALL-E 3 and Stable Diffusion | High performance in language tasks | High performance in language tasks |
Also Read: Which Is Best? DeepSeek vs. ChatGPT vs. Perplexity vs. Gemini
Conclusion
DeepSeek Janus-Pro offers a powerful way to run advanced AI models locally, optimizing performance through GPU acceleration, quantization, and fine-tuned parameters. Whether you’re building AI applications or experimenting with large language models, mastering these techniques enhances efficiency and scalability.
To deepen your understanding of AI and ML, Great Learning’s Artificial Intelligence Course provides expert-led training on model deployment, optimization, and real-world applications—helping you stay ahead in the AI revolution.
Also Read:


